28 April 2023
I found a nice and complete collection of Macintosh Classic II. It included the Mac itself, keyboard, mouse and an external 800k drive. Someone sells this thing on Instagram, and then I contacted the seller to ask about its condition. He said that it was first hand from his uncle and last January 2023 it was tested okay and running. But currently, he didn’t have the power cord to test it. So I decided to do gambling to buy this old machine, I hope that the internal battery is not leaked or better it has already been removed.

It was manufactured on October 1991, which is before I was born 🤣

After dealing with the price and shipping charges, it then shipped with cargo to Yogyakarta from Bandung. My concerns were the internal battery and the CRT. I hope the CRT is not broken by the shipping. He said that he added more plastic wrap to protect the CRT.

1 May 2023
At noon around 1 PM, I was contacted by the cargo courier that they will send a package to my home, and they need me to stand by. Fortunately, I am working at home. So the package came and the wood package was already removed by the courier (I don’t know why they do this without confirming with me first). Everything was complete and arrived safely without any crack on the CRT. Except for the keyboard cable to the computer 😢
Missing keyboard cable
The cable is so rare because it’s not a PS/2 cable but a cable with (Apple Desktop Bus) ADB connector. On eBay, it’s around Rp. 200K to 500K. So I asked the seller about the cable, and fortunately, the cable was not missing but he forgot to include it with the package.

So he sent the cable without asking for shipping cost 😀
Tearing down

Okay, then I checked and opened the machine hoping that no battery leakage on the logic board. I opened the case but there are missing screws on the top section of the case. There should be four back screws for the Macintosh design, 2 on top of the case and 2 on the bottom case.

CRT was okay, with no crack and still vacuum tube was still sealed. One thing that makes me happy is that the battery has already been removed from this machine 👏 although it was very dirty with some dead animals.
Dusty logic board

As I expected, the SMD capacitors are leaky, and they leak into many components around them. Some of the leaky electrolytes go under microchips, which are difficult to clean, except by removing the components and cleaning them or using an ultrasonic cleaner.
1
Btw this board included 2 SIMM RAMs which were 4 MB each. So the internal memory total is around 10 MB
2 May 2023
I tried to disassemble the analog board which I need to remove some cables from the CRT. This needs extra caution, especially for the flyback cable. You need to prepare a cable and a minus screwdriver, which will be used to ground the anode from the CRT.

1
Please be careful when you try to do this, it can zap you with some fatal consequences.
After removing the anode cap, I need to remove the connector on the backside of the CRT. I also need to be careful about the vacuum tubes because it’s very fragile.

After removing the connector on the CRT, this time I need to remove the analog board on the side of the computer. This board also suffers from leakage caps, and leakage is visible from one of the caps (the one with brown liquid on top).

This is a common issue with this analog board. You must replace all of the caps on the analog board rather than replace the leaked one. Because of the age, the “seems good” caps will tend to leak soon.
I ordered some replacement capacitors from Tokopedia. I pick the best one which variants from Nichicon, Elna, Panasonic, etc. Those brands have a good reputation as capacitor makers. I ordered mine from this store which has most of the capacitors needed in one place Power Jaya Plaza.
Optocoupler & other suspects

I inspected the board aside from the capacitors, there are some components that tend to fail because of the age of this component.
- Optocoupler (QP1 - CNY17G)
- Zener Diode (DP3-DP4 - 1N4148)
- Trimpot (PP1 - 220 Ohm)
- TDA4605 (I didn’t replace this one *yet)

This is the view from my analog board from the soldering side, some flux needs some cleaning. As you can see at the bottom of the board, there’re black areas from which the capacitors have leaked to the bottom side of the board. Better to clean the board using IPA 90%.
3 May 2023
Still waiting for the capacitors to come, I tried to do the logic board first. I plan to replace all of the electrolytic capacitors with the tantalum one, which has better age and doesn’t leak.

As you can see around the capacitors (rounded white metal), there are some electrolytes on the board which come from the leaking capacitors around it. I need to clean those using IPA, but the board is also dirty from dust. So I plan to do ultrasonic cleaning after recapping, but this is the first time I do this, so I’m a little bit worried about the result, hoping that everything is okay.

Some of the traces were lifted because I’m not very careful when I remove the old capacitors. So I used the PCB UV glue to fix the traces and do some wiring to fix those disconnected traces. Sorry, I don’t have photos of that.
4 May 2023
The capacitors for the analog board have arrived. Now it’s time to do recapping the analog board.
Caps gunk

You can see the CP8 which is the previously leaked capacitor, leaves a gunk on the bottom of it and the surface of the PCB. I also need to clean those using IPA and replace them with the new one. Btw, beside the CP8 there is LP5 which is an inductor with missing ferrite. The glue has come off because of the capacitor leakage. Fortunately, I found the missing ferrite inside the case.
After Cleaning

After cleaning with the IPA, the board looks clean from the brown gunk. But it’s not over, still plenty of capacitors that need to be replaced.
5 May 2023
All the caps on the analog and the logic were replaced, and now it’s time to try to switch on this old machine. As you may know, this is the first time I turn on the machine. I never turn on the machine after it came from the shipping, because I believe that it may be dangerous if I don’t check the components first.
First turning on

Tada! The vertical stripes are shown on the monitor. I didn’t expect to see this machine start normally though. Some of the machines on the Macintosh forums have the checkerboard screen, but mine has the vertical stripe screen.
Btw, when I do the first turn on, I put back the back cover. Because I’m afraid that something will blow up 🤣.
okay moving on…
6 May 2023
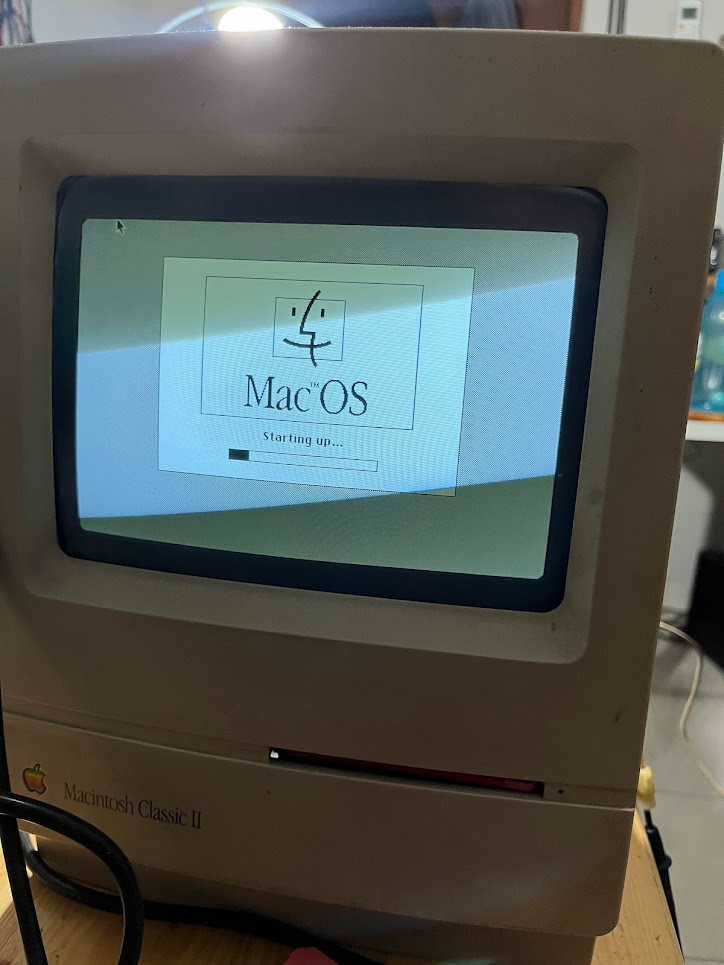
The next day, I’m doing my job as usual and trying to give the Mac some warming up. As I do my job, I’m in shock when hearing BONG chime, and the screen comes ALIVE !!!
The first word I said was WEH and I thank God afterward 🙏
Nothing much on this day, because I’m kind of busy with my job. Some people on the forum said that they had under-voltage issues with their Mac Classic. I did have this issue, the under-voltage issue because of the Optocoupler and the diodes as I mentioned above. I also replaced the PP1 trimpot, because its voltage is not stable, as I move the trimpot, it kind of has a blank spot on the trimpot, I guess because of the age of the trimpot.
7 May 2023
I forgot to tell you that I did ultrasonic cleaning using a Relife PCB cleaner. And you know what, it destroys thin plastic on the PCB, as Mic Jack cover, and the RESET and INTERRUPT buttons on the side of the PCB. So I decided to replace using the regular push button.

Internal floppy
After successfully starting up the Macintosh, now I moving on to the floppy disk, so then I can try to boot some system disks. This floppy disk is different from the PC one, so it’s not interchangeable. I’m tearing down the floppy disk drive and giving some cleaning and lubing into all the mechanical.

Floppy Ejector Gear

As I expected, the ejector gear is gummed-up and tearing apart. It is the rightmost gear that is broken, everything else is okay. Some people still remake these gears, so I ordered one from eBay. Maybe it will arrive around the end of June.
So for now, I’ll eject the gear with a paper clip.
The Head

This is the original head from the seller that I never touched before. There is some space between the top head and the bottom head. At this position, the top and bottom head must be touched together. So I need to adjust the spring at the bottom of the head structure. How to do it? You can see the video from Branchus Creations
After doing the adjustment, finally, the top head and bottom head are touching.

13 May 2023
I didn’t have a diskette to test the floppy disk. So I ordered online from Surabaya and Jakarta. I ordered a BNIB (Brand New In Box) for 1 pack which contains 10 diskettes, it cost me around Rp 300k. Also, I bought a used one, much cheaper around Rp 50k for 10 diskettes. On this day, the package is coming and at first, I tried the new one. The package is sealed and there’s no guarantee that the disk will work (sad).
Do you know what, every disk is not working, and you can spot a mold on the surface of the disk! When I tried to read the disk, it make unusual noise and I’m afraid that it will destroy my floppy disk. I was trying all of the 10 disks, and all of it has the same issue.
So I decided to go with the old used disk, most of it was working okay. So if you want to find a diskette these days, try the used one, the seller tends to try it first before shipping. Because if you buy the BNIB one, the seller didn’t test the disk, because it is sealed.
Creating System Disk

I’m using this old external IBM floppy disk to write the system disk into the 1.44 Mb floppy disk. For the burner software, I’m using WinImage. For the system software, I’m using System 7.0.1 which is recommended by some forums. You can download the image from here WinWorldPC.
1
Note: Macintosh Classic II doesn't support System 6.0.8, but Macintosh Classic does.
Testing System Disk

After successfully writing the image to the floppy disk, now it’s time to test the disk. And… it’s still failed successfully. The floppy disk still won’t read the disk. There was some reading noise and then followed by an eject noise, and then a diskette icon with an X mark on it.
14 May 2023
I have an external 800k disk from the seller, and I assume that the internal disk was broken in the first place. FYI the internal floppy disk is FDHD which supports a 1.44 Mb disk instead of the 800k external disk which only read 400k and 800k disks. So I inspected the internal floppy head, and I think the top head seems to be fell of. I don’t know if it was originally like that, or if someone has been trying to repair it before.
So I decided to try swapping the 800k head with the FDHD head, and….

A little happy Mac.
So I found out that the 800k and the FDHD head have the same physical and functional, but with a different control board. So far it can read and write into 1.44 Mb disk normally, and I have no issue with it.
It’s done for the floppy, now I just need to wait for the replacement gear to come.
15 May 2023
This time, I want to try retrobriting some of the cases. This is the first time I’m doing this, and little worried that it fails. So, I’m using 10% H2O2 (Hydrogen Peroxide) and a plastic container to do it. For testing, I did the mouse first, because it’s small and fits with my plastic container.

Leaving on the UV light from the Sun (I bought UV light too, but in the end, I won’t use this) for 1-2 hours.

Here is the result.
After having success retrobriting the mouse, I tried the other peripherals (keyboard, external floppy, and Macintosh case). 
BlueSCSI
So after successfully running the system from the floppy disk, I want this Macintosh to have a hard disk. But these days a hard disk is not reliable and it’s slow. So I search online about having microSD interface to use with this old Macintosh.
So I found BlueSCSI which is open source and if you need to buy one, you can order from the website BlueSCSI.
Unfortunately, it’s not available in Indonesia. So I think because it’s open source, I try to recreate the PCB and build one for myself. I replaced the Resistor Array and the MicroSD shield because it’s hard to find in Indonesia.
So here is the result
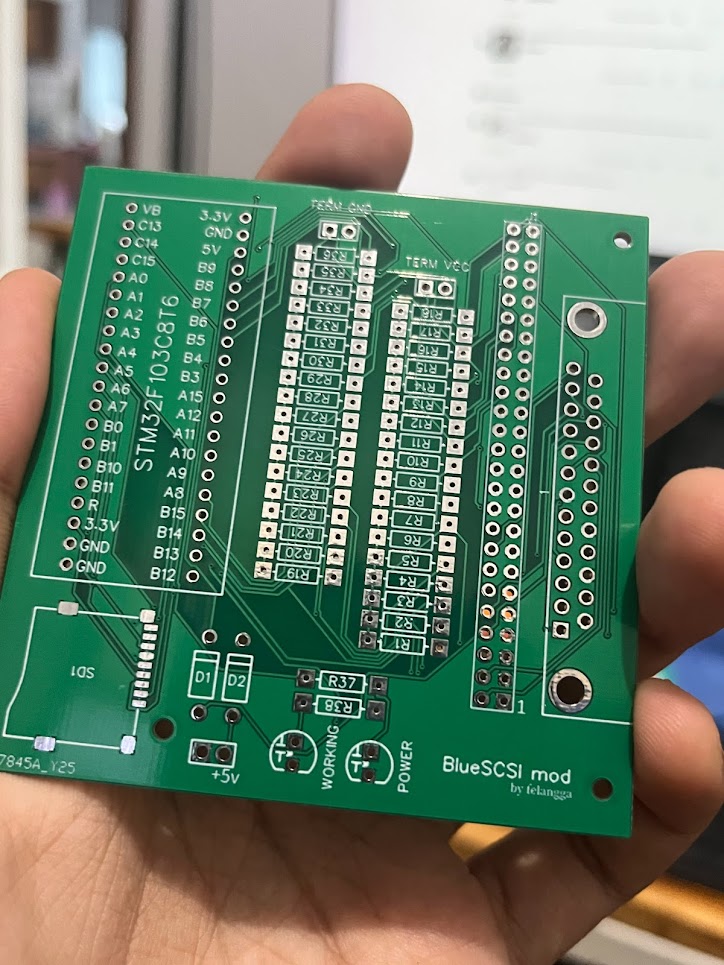
I forgot to print the PCB with blue color. I still have 4 of these, if you want to order, you can contact me.
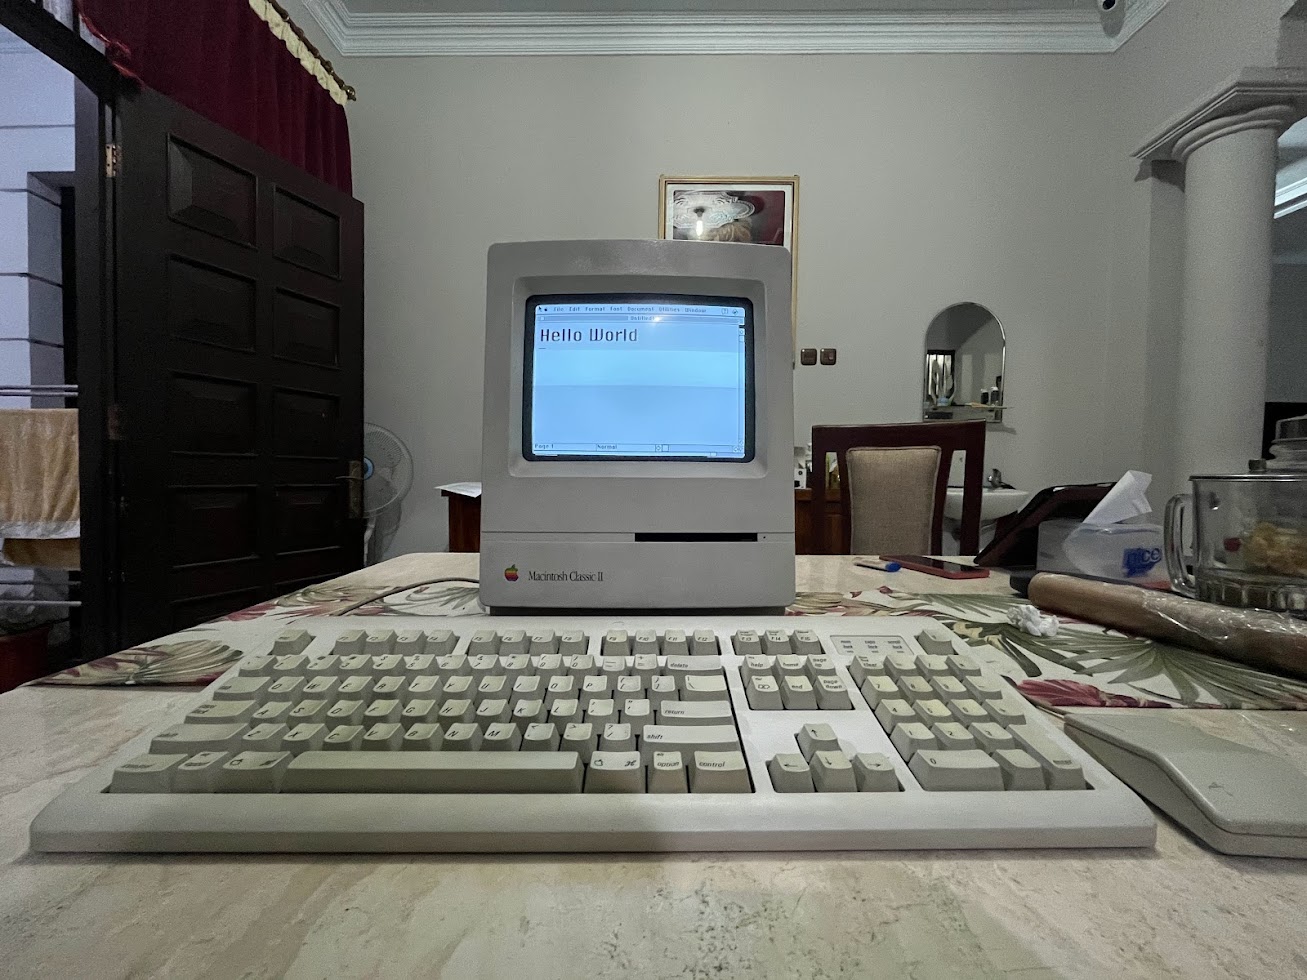
Running on BlueSCSI
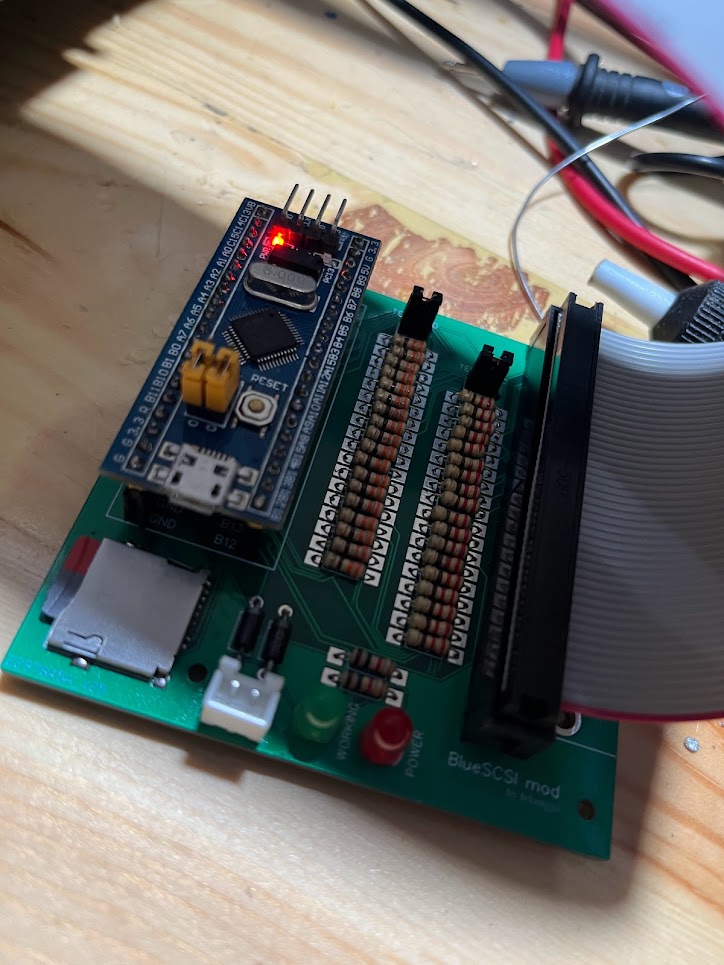
After assembly and burning the images on the microSD, it’s time to test this device. Btw, I’m using System 7.5.3 which is a little heavy, better use System 7.0.1 for this old machine.
You can watch the video here
28 May 2023
Currently, there is no PRAM battery because the original battery is removed by the previous owner. So I decided to replace the battery with CR2032. This kind of battery is not leaking and won’t be exploded like the old type of battery. So I modified the CR2032 battery holder to be able to be inserted into the original battery holder. 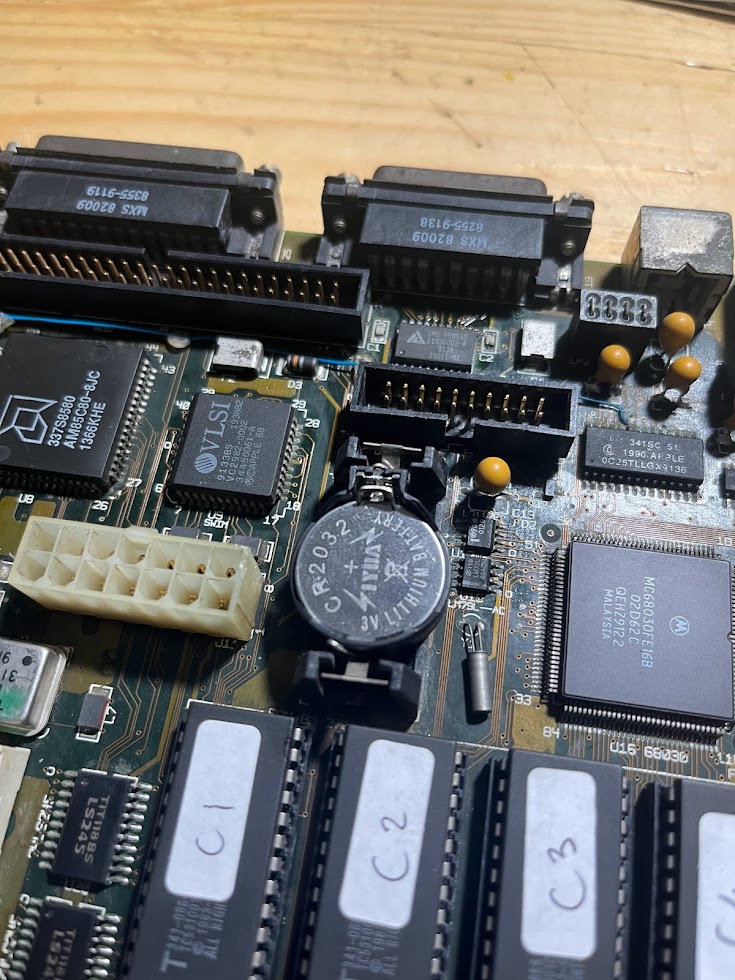
29 May 2023
This is the final restoration of the Macintosh Classic II, but there are some remaining problems that I still need to fix but currently, I don’t have a solution for this:
- Sometimes the screen would wobble and some noise appears on the right side of the screen.
- The geometry of the CRT screen needs adjustment, already tried to adjust the magnet, but still not perfect.